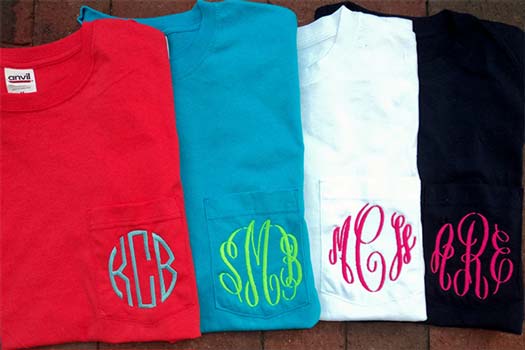
How To Monogram A Shirt: Know Different Ways From Expert
What is the dearest personal belonging a person can hold?
Yes, you got it right! None other than his/her own name.
This is the first thing that’s assigned to us after birth. One of the traits of being a human, a name!
After all, animals don’t call them with names, not that we know of. And sometimes we can give life rather than mortifying the name.
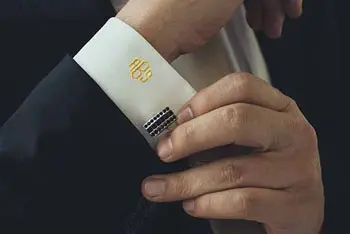
People will do many things to show their endearment to the name. One of these things is monogramming the bags, pockets, and cufflinks with the initials of their names. But perhaps, monogramming the shirt is the most classy, attractive, and personalized among them.
The ultimate customization! Yes, that’s what it stands for.
For those who don’t know how to monogram a shirt, you’re missing something special. When done in the right way and with right etiquettes, it can be a fashion statement of how classy of a person you are!
And that’s where, my friend, this guide comes in. Keep reading if you intend to delve into the world of monogramming. And it’s easier than you think.
Table of Contents
What is A Monogram?
Monogram is a kind of symbol. But it isn’t just ‘any’ symbol, rather it signifies both ownership and personalization. It usually consists of two or more letters, often connected and interlocked.
Sometimes, they can be simply arranged, other times you’ll see borders and artworks in and around them.
Sometimes, it can just be a letter, single yet embellished. It adds class and ownership to any accessory.
So where those letter or letters come from? Obviously from the possessor's own name. These custom monograms can be imprinted on any accessories like luggage, bags, mugs, home decor, doors, etc. But probably, the most popular are the ones engraved on apparels.
History of Monogram
The history of monogram goes as far back as 6th century B.C. Rulers of that era started to monogram coins to show their royal authority and establish means of trade.
After that, merchants, riches, and artists started to adopt this innovative style to distinguish their belongings and work. This continued through the middle age.
The use of emblem for style purposes is relatively new. However, it wasn’t always welcome in American society. Back in the ’80s, it was seen as show-off and unsophisticated.
But those days are gone. Monogram has come back in style in the 20th century and you’ll see companies, artists and individuals use it as a style statement. It shows that you’re confident and happy with yourself.
How To Monogram A Shirt: Beginners Guide
Now, you’ve decided to give your ordinary shirt, pocket or handkerchief a distinctive touch. You see people doing it with style, and you want to get into that boat. So how do you do it?
Monogramming is most commonly done by sewing machines, embroidery machines to be more precise. Thanks to modern sewing machines, the job is easier than ever. There is software that combines with the machine to get the most complex, sophisticated monograms done.
But that’s not the only way though. Back in the earlier days, when embroidery machines were a luxury, people used to do it with that. Surprisingly, the method is still popular and preferred by many.
Heat press machines and vinyl machines also work wonders when it comes to emblems.
Especially if you’re looking to get into a monogramming business, these machines will give you the speed and automation you’ll need.
Let’s dive deep into these methods, shall we?
1. Monogram A Shirt With An Embroidery Machine
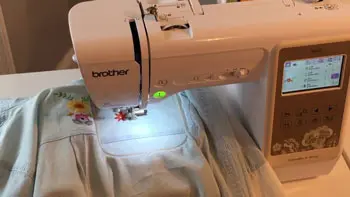
The most popular way to monogram your shirt, pockets, or other apparels is using an embroidery or sewing machine. Below are the steps of using a modern embroidery machine for this very purpose-
Step1: Set Up Your Machine
Put your machine into somewhere that allows you to move freely. Plug the device and let the machine start.
Now, not all sewing machines can perform this job. The device should have embroidery options. However, with software, preset lettering and designs, the job is easier than ever.
Select the design and font you’re going to use. Also, input the size you want the design to be. Thread the machine with the particular colored thread you chose.
Step2: Place The Hoop And Monogram
Mark the center point of your monogram. Make sure you’re keeping ample space around to fit the hoop. The position of the hoop usually decides where the design will be.
Now, place the hoop on the fabric. Make sure the center of the hoop goes exactly where your center point mark is. This way, the machine will engrave the design right where you want.
Place a stabilizer inside the hoop and under your shirt/pocket. This way, the fabric will be stable and won’t move when sewing.
Step3: Start Your Machine
Now, attach and secure the hoop in place. Make sure you’re doing it as the instructions say since it’ll move under the thread. Make sure your hands and any other obstacle is away from the hoop. Now start the program, sit tight and let the machine do the work.
When the work is done, detach the hoop. Cut the excess thread and remove the stabilizer from the back of the cloth. Depending on the type of the stabilizer, you can remove it by cutting, ripping or washing. And now, your beautiful design is done.
2. Monogram A Shirt By Hand
The process is much simpler for sewing by hands. It’s time-consuming, but it can be a great hobby and a constructive way to express your creativity. Let check out the steps of how it’s done.
A. Draw A Sketch
This is where you let your creativity and imaginations go free. A monogram consists of several letters and you can put them any way you like. Play with the upper and lowercase design. Draw borders, use different fonts.
You can take inspiration from different designs you’ll find on the internet or design books. Make sure you’re drawing it in the exact size you want your monogram to be.
B. Decide The Area
Now, like it is with embroidery machines, decide the place where you want the monogram to be and draw a center point. Keep ample space (at least 2 inches) around the design to place the hoop. It’ll be difficult to sew without a hoop.
Transfer the design from the paper to the fabric. To do that, place a carbon paper between both and trace over your design. The motif will transfer from the paper to the fabric via carbon paper. Before tracing, make sure all of them are placed over a plain and hard surface.
C. Embroider By Hand
The design part is over. Now attach the part of the shirt with a hoop to stabilize it. Choose the thread color of your choice and start sewing. Always make sure the color you choose goes well with the fabric color.
First, outline the letters with split stitch. Now work on filling the letters with satin stitches. In case you don’t know already, you can look on the internet to see how they’re done. Cut the excess thread after the work is done and here it is; your gorgeous monogram!
3. Monogram A Shirt With Vinyl
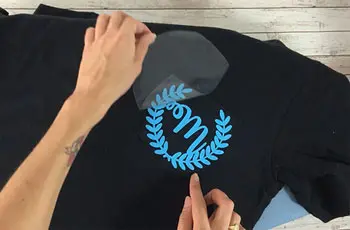
Vinyl can be an excellent choice to monogram your shirt, pocket and or any other place you see fit. Unlike hand sewing, this one needs playing with computer and software. This allows you more freedom to portray complex and sophisticated designs.
A. Use The Software
You can use the software your device is compatible with to make different designs. Open a blank sheet on the software. Use preloaded fonts or download new ones to find the fonts of your likings.
Now, type all of your initials and attach them. There will be places where they’ll overlap, and you’ll want them to be cut as one instead of three. Select the ‘Weld’ option from the software. If you down design the initials in an interlocking manner, rather just side by side, use the ‘Attach’ option.
B. Cut The Vinyl
After you’ve finalized the design and its size, it’s time to cut it. Click the ‘Make It’ button to see where of the mat the design will be cut by Cricut machine. Place the backing side of the vinyl paper onto your mat. Make sure to cover the space properly where it’s supposed to cut.
Now, select vinyl with the help of the knob, load the blade. Finally, feed the mat using the ‘Load/Unload’ button of the machine. When the loading will be done properly, the Cricut button will blink and press it to cut the monogram.
C. Transfer The Vinyl To The Shirt
The final stage now begins. It’s time to transfer the vinyl to the shirt and a heat machine will help you with that. Fold your design into equal halves vertically and horizontally to find a center spot of the design.
Now place it on the area you want your design to be on the shirt. Put a multi-use paper over them and keep them under the plate of the heat press machine. Wait for 10-15 seconds, the machine will beep and you’ll know the transferring is over.
Now, peel off the additional layer off the vinyl and voila! You’ll see it’s nicely transported and imprinted on the shirt.
4. Monogramming Shirts - Other Methods
Well, that’s not all we have in our sleeves. If you’re well onto initials and motifs, there are some other ways to express your individuality and personality.
A. Painting- Yes, the good old painting. Like any other surfaces, you can always take up your brushes and paint sophisticated designs. Draw a design on a paper and use a carbon paper to trace it on the fabric. Use narrow brushes to paint accurately over the trace.
B. Bead/ Rhinestone/ Sequin- You can use them in two ways. Either you can fill the inside of the outline by these beads, or you can fill the surroundings so that the void give an impression of a monogram.
C. Applique- With a combination of satin fabric and applique method, you can make attractive designs. The applique is the process of sewing fabric over another fabric. These designs can even beat embroidered monograms.
How To Monogram A Shirt Pocket?
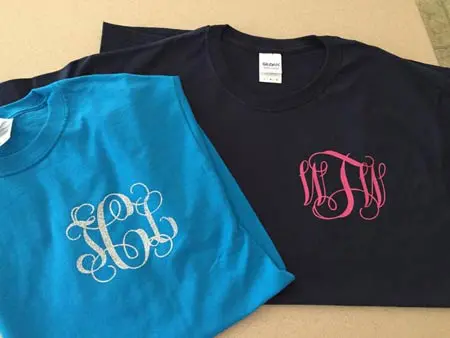
The process is similar and you can use all three methods to engrave your initials on the pocket. Although, the design and font size will probably be smaller since pockets are small compared to a shirt.
Usually, I’d advise hand sewing or embroidery machine to monogram a shirt pocket. It looks better and more stylish. Nonetheless, you can use the heat transfer method to like we discussed above to imprint initials. It’s all about the preference.
Monogramming Fabrics- Etiquettes And Tips
1. Keep It Subtle
There is a difference between classy design and being artless. The monogram you engrave should be understated. It should be small, almost invisible, yet noticeable in its own artistic way. The color should be low key and in par with the shirt color.
2. Reason With It
You shouldn’t use it just because it seems cool. That will be an unsophisticated thing, right? It should be used to personalize your accessories. It cannot be flashy.
You should be already in love with the garment you put a monogram on, not just that tiny part. Limit yourself with one monogram instead of putting several here and there.
3. Just Your Initials?
Let me tell you a secret. A monogram doesn’t necessarily need to be just your initials. It’s ideal, but you can use depictions too. It can be something that represents you or the initials of your loved ones.
Monograms can be done on anything, but don’t you make the house goods filled with them. The lesser they are in numbers, the more significance they bear.
Wrapping It Up
Monogram is a custom, personalized way to express yourself. It’s always special to wear something you already love with your initials engraved on it. It makes you a bit more special than the next guy.
If you know how to monogram a shirt, it can be a good pastime too. Expressing your creativity is such small letters, it’s challenging, but beautiful at the same time. It’s your little luxury and can be your source of profit if you run an embroidery business.
Let go of tradition, free your souls, set your artistic mind free. Tell a unique story about yourself with those initials. When it’s about your name, go out of your way to preserve it.
Our Other Accessories:
>> Get A Glass Bottle Cutter From Our List

