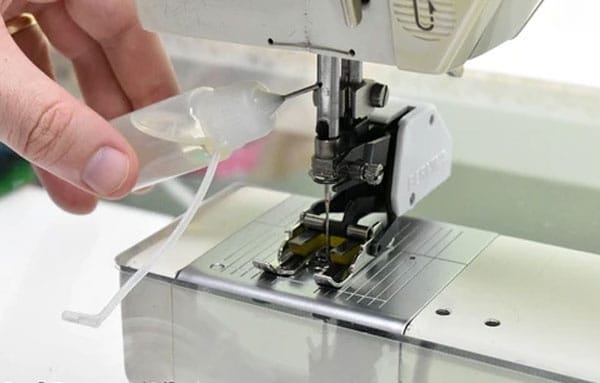
How To Oil A Sewing Machine At Home (With Cleaning Tips)
A sewing machine may have seemed mundane to most of us when we are younger. But as we grew up, we realized this “mundane” device is used for making the most beautiful outfits and designs!
It takes away the fatigue of limbs and the strain of eyes from a diligent seamster. As a result, their job becomes easier and more gratifying.
However, like most mechanical pieces, a sewing machine also needs maintenance from time to time. Their servicing mainly involves oiling at regular intervals throughout the year. That is why we are here to find out how to oil a sewing machine and clean it up before that.
How Often Should You Oil Your Sewing Machine?
There is no one-size-fits-all approach when it comes to oiling the sewing machine. The frequency of doing this should be decided based on two major factors - how often you use it and what kind of fabric usually goes into it.
For instance, if you use heavier fabrics like velvet for hours every day to complete your sewing projects, the machine will definitely need oiling more frequently. In such cases, doing it on a weekly basis is a good idea.
On the other hand, if you use it only occasionally and work with fabrics that are much lighter, then weekly oiling is not necessary.
Do it once a month if the sewing machine is used once or twice every week. If it is used even less often, then oil it only every three months.
If you are going to start working on an old sewing machine that has not been used in years, it is a good idea to oil it up and fix any remaining issues by an expert.
Types Of Sewing Machines Oils And Their Uses
PolaroidFotobar editors when writing this post they find various oils that you can use to instill new life in your sewing machine!
However, three of them shine the best and make the device more effective. So let’s see why these particular oils are the most popular when it comes to sewing machines.
1. Mineral Oil

This kind of oil is also called petroleum oil since it is made of various kinds of petrochemicals. Elements from crude oil are used to prepare it. That is why mineral oils are cheap and easily accessible to the masses.
So if you want to keep the sewing machine maintenance on a tight budget, this category of oil can help. Along with the affordable price points, mineral oils have other conveniences like being transparent and odorless.
As a result, you don’t have to worry about it making the oiling task an unpleasant one for you through pungent smell. You can wear light-colored clothes while doing it since these oils don’t form stains.
However, it is of utmost importance that you use this in the right way. Otherwise, applying mineral oil in the wrong places can do more harm than good to the machine!
Besides, make sure to store the oil at a place out of children’s reach. Ingesting or inhaling it can lead to serious respiratory problems by causing irritation in the tracts. For the same reason, you should keep the duration of oiling the machine relatively short.
2. Natural Oil
For those of you who prefer everything natural and are conscious of environmental effects, natural oils seem to be the ideal choice. As the name suggests, these oils are made from natural ingredients like jojoba oils, ester oils and silicone.
You can prepare the oil yourself by combining 1 tbsp of ester oil, 1 tbsp of silicon oil and ⅓ cup of jojoba oil. However, it is safer to rely on the readymade natural oils since the homemade mixture has more room for error.
Remember to apply just a drop of your DIY oil on the machine to see if there is any negative effect. Compared to mineral oils or petrochemicals, natural oils are safer to use because they don’t have the dangers of similar health hazards.
But you still need to keep an eye on its blending ratio and process. Getting either of them wrong can lead to more decline in the quality of your machine.
3. Synthetic Oil
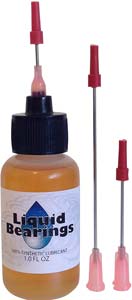
Synthetic oil is good for the sewing machines which have plastic moving parts, along with steel or metal parts. This is the best oil among the three for such machines since the other two can’t work well for plastic material.
It can extend the durability of your machine by preventing breakdown of threads.Another good aspect of this oil is that - applying too much of it on the machine will not cause any damage.
So you don’t have to stress over the “perfect” amount of application. Unfortunately, synthetic oil is usually available at a much higher price point than others.
As a result, it can’t be the first choice for budget-friendly options. However, the benefits it provides are more significant than the corresponding cost.
Sewing Machine Oil Vs 3 In 1: Which One to Use?
The 3-in-1 oil is considered to be the VLC of household products!
That is because, you can use this one oil for cleaning, lubrication and protection of various domestic items. But is it a good idea to use 3-in-1 oil on your sewing machine?
Nope, it is actually not at all recommended for this job!
There are several elements in the 3-in-1 oil that vaporizes after a while and its sticky residual makes the machine even dirtier than before!
So refrain from using it as a sewing machine oil and choose from the many variations discussed above!
How To Oil Sewing Machine- Step By Step Guide
1. Cleaning The Sewing Machine
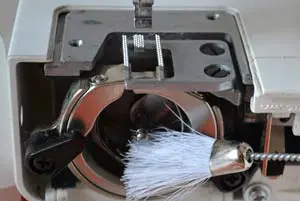
Before you can oil the machine, you must make sure that it is free from any dirty residual.
Otherwise, the oil will make such deposits even more grimy, sticky and thus harder to get rid of.
This new consistency can also help it to get into other parts of your machine. So clean the sewing machine in three easy steps-
Preparation
The first thing to do is to remove the extra parts and materials currently attached to the machine.
These things can obstruct your reach to different sections or make it more difficult than it needs to be.
Common things that need to be taken off include excess thread, needle, stitching plate and hooks.
Also, if it is an electric machine, remember to take the plug off and shut down its power connection.
Brush
Get a small and narrow lint brush that can get into the cramped spaces of the machine. Use it to brush off dry dirty particles from the device and use tweezers to reach places that are even harder to hit. For any residual still too stubborn to leave, wipe them away with a soft cloth.
Compressed Air
After you are done getting rid of the lint, use compressed air to finish off the job. Hold a can of this air to point at the smaller or more congested places to blow off the remaining dirt. Especially, the bobbin case and its surrounding area will be a good place to utilize this can.
Remember to maintain a distance of 10-15 cm between the nozzle and the target area. It is a good idea to remove the needle plate and clean under it. Follow the instruction manual provided with the sewing machine for maximum effectiveness.
2. Lubrication Process
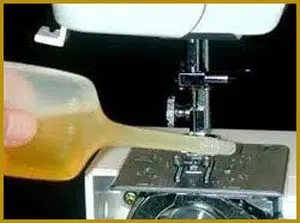


Now that the machine is free of lint and other dirty materials, you can start oiling it!
By now you must have chosen your most preferred oil out of all the options. So take it in a small bottle and prepare to lubricate your sewing machine in two simple steps:
Drops
Start applying the oil in drops to the places instructed by your sewing machine manual. The common areas where the oil should reach include bobbin case, shuttle hook and the bobbin hook’s outer ring.
Squeeze in one or two drops of oil in these sections and see if it needs more. If you are not using synthetic oil, don’t lubricate the plastic parts.
Wipe Away Excess
After the machine parts have received enough oil, wipe off the excess with a small cloth. This step is important because the residual oil left there can later stain the fabric you work with. Run the cloth through its parts and then rub the exterior. Use soap on the outer parts for the best results.
3. Re-installation and Testing
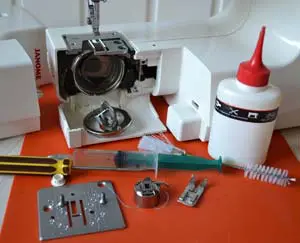


When you are done with the lubrication, it is time to put the detached parts back in place. After assembling the sewing machine fully, try it out for a test stitch to see if there is any unusual sound or stain on the working cloth. Wipe off the excess oil wherever it resides and then begin your actual projects.
Tips And Cautions When Oiling The Sewing Machine
Here are some handy tips on cleaning and oiling the sewing machine to ensure the best results!
If it is an electric sewing machine, disconnect its power sources before doing any of the steps. Otherwise, you may get injured from the moving objects like needles.
Never use all-purpose oil, motor oil, petroleum jelly, waxes, motor oil or automotive lubricants for this job.
If you have not done this before or don’t know what steps to follow for oiling the machine, just take out the official manual provided with your sewing machine and use it as instructions.
When you are cleaning the parts of your sewing machine with a compressed air can, hold the nozzle at a distance of at least 10 cm from it.
Don’t disassemble the whole machine at a time. Take a few parts apart at once so that you don’t struggle to reassemble it later.
Conclusion
Take care of your valuable sewing machine from the comfort of your home with these tips and methods. Help other seamsters too by letting them know how to oil a sewing machine at home this way.
Just oiling every once in a while can extend the lifespan of your machine and thus give you the pleasure of creativity for a long time!
Follow Our Other Sewing Related Post:
>> Know How A Sewing Machine Work
>> Sewing Machine Vs Serger Vs Coverstitch
>> Monogramming A Shirt: Know Different Ways

