How To Use A Polaroid Camera: An Easy Guide For Beginners
We all love capturing our memories and making them timeless with our cameras. While there are many modern digital cameras and the ones on our smartphones, the appeal of a good old polaroid photo is still alive.
These particular models of instant cameras help us cherish the moments instantly after clicking them.
Besides, it has always been a stylish device to carry around since it comes in so many colors and a cute compact design! As a result, investing in a polaroid camera is never a bad idea!
But do you know the right way of taking photos with this camera?
If not, look no further! We have compiled the best tips to get a newbie to begin their adventures with a polaroid camera. So here we discuss how to use a polaroid camera in the most effective ways and more!
Related Product: Polaroid ZIP Printer
What Is A Polaroid Camera?
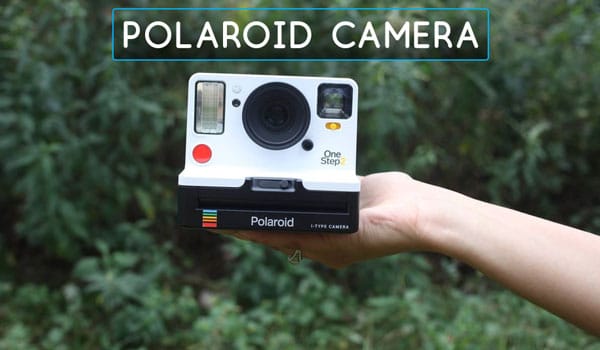
If you have ever been confused by the term “polaroid camera”, you are not alone! It is basically an instant camera that delivers the photographs immediately after you take them.
These are better known as polaroid camera because this technology was first developed and patented by the Polaroid Corporation.
They were the pioneer of this revolutionary technology which allowed people to lock in their memorable experiences instantly and marvel at their photographic skills within a minute of taking the picture.
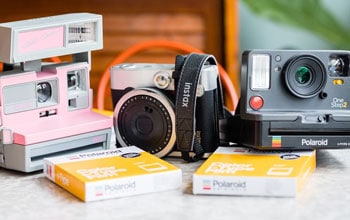
This kind of camera relies on self-developing films to provide the photos so fast. They have been in existence since 1923 and was made available to the masses through their first commercial edition launched in 1948. Now you can find modern polaroid cameras from many other brands like Fujifilm, Leica and Kodak.
How To Use Polaroid Camera?
It is not hard to get a polaroid camera yourself!
You can find it in any camera store. After you have obtained one and a compatible film, it’s time to learn how to use the new camera!
That is because the polaroid functions a little different from the usual DSLR or point-and-shoot cameras.
To start clicking photos with it, follow the steps narrated below:
Loading Cartridge

Before you start taking pictures with it, you first need to prepare the new camera by equipping it with suitable films.
So turn to the back or bottom of your camera and open up the flap there by pulling its switch. This will reveal the container meant for storing the film cartridge. Now insert it there such that its metal parts are facing down and the darker side is facing the cover.
If your polaroid camera is not new and already contains an old cartridge, you can preserve the cartridge by taking it out in a fully dark room. Remember to store it in a container that never comes in contact with light.
You should see a dark film-like slide sticking out from the camera soon after you are done loading the cartridge. If this doesn’t happen, you need to check the device to see why it is not functioning properly. This slide can be used to keep the photos safe during exposure.
Power On

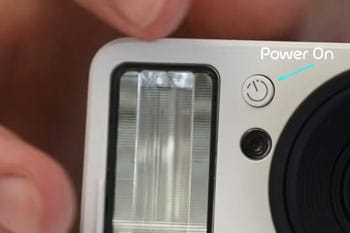
Now you need to turn on the camera. This process can be different for each model of the polaroid cameras.
For the ones belonging to the 600 series, you may need to open up the flash bar and close it soon after. You will probably need to make this move almost every time before taking a photo.
When it comes to most other polaroid cameras, you will need to flip up the flash bar. There are some models that do not require turning on the camera before use at all! A good example of this category is Polaroid SX-79.
Fixing Exposure

In photography, the term exposure represents how sensitive your camera and its film are to light. To put it simpler, it decides how light or dark the tones of your photos are. That is why you need to fix it properly before taking the shot so that you can highlight the subjects of your photos the way you want.
The Polaroid cameras of OneStep series come with a slider which you need to manipulate for adjusting the exposure. It can change the amount of light that gets inside your camera lens. Try out some shots with various exposure values to find the ideal one.
Some films like the Impossible Project SX-70 comes with higher light sensitivity and a switch to manipulate the exposure. So you need to be more careful with the exposure while working with these films.
Stand At The Right Distance
It is time to prepare for taking your first shot with a polaroid camera. Start by being at the right distance from the photo subject since these cameras use depth of field to adjust its lens focus.
So find out the most effective distance to ensure the best sharpness and therefore quality for your image.
The ideal value of this distance is 4 feet at a minimum. If your model has a closeup setting that allows taking photos of farther objects, we would still recommend taking photos within the suggested distance.
Find The Right Frame
Framing is undoubtedly one of the most important aspects of taking a good photo. The wrong frame can make even a good subject look unappealing in a picture.
Unfortunately, polaroid cameras will not show you how the image will exactly come out. They come with a viewfinder which makes finding the right frame a little harder for users.
So you will need to take an extra step to make sure that the resulting photo does not look quite bad.
Snap, Protect And Wait
Finally, you can take the shot by pushing the button! However, you cannot marvel at your photography skills just yet.
The snaps will come out as blank black squares. You will need to protect them from coming contact with light for 10 minutes to half an hour depending on your model. This period is necessary for the chemicals involved to develop.
To keep them safe from light exposure, you can either use a paper to cover them, or you can put them in a light-safe container or pocket.
Special Tips- How To Use Polaroid Camera At Night
Now that you know all the basic skills of taking a proper photo with a polaroid camera, check out some handy tips to use it at night!
Steady Camera
You must hold the camera steady for getting a proper shot at night. One way to make sure it is stable is by using a tripod with the camera’s mount socket.
If your model does not have it, you may need to think of other ways to set up the tripod. Alternatively, just place it on a flat solid surface with a side structure to support it.
Pose On Hold
Moving objects don’t make for very good photos at night. The same goes for people in the image. Therefore, if you have thought of a mesmerizing pose to take a gorgeous photo at night, you need to hold the pose for a while so that the camera can capture it well. Otherwise, the result can be blurry.
Right Light
Flash helps out a lot while taking pictures with a polaroid camera in darkness. One way to enhance the illumination even further is to place a small portion of white electrical tape on this flash.
Doing so will prevent a sharp light to hit your subject and result in a more sophisticated soft illumination instead.
While this trick and the flash work great for dark setups, its use in a well-lit is debatable. If you are taking the picture in an area that is already bright, the flash will only make things worse. So just switch your camera to the outdoor settings for getting the right amount of light.
My opinion use a photo light box for taking professional picture like product photography or anything.
Conclusion
As you can see, knowing how to use a polaroid camera in the most effective way takes a little bit of effort.
However, with some practice, it should come to you naturally in no time! So get ready to capture the beautiful sceneries, fun memories and more with your polaroid!

